


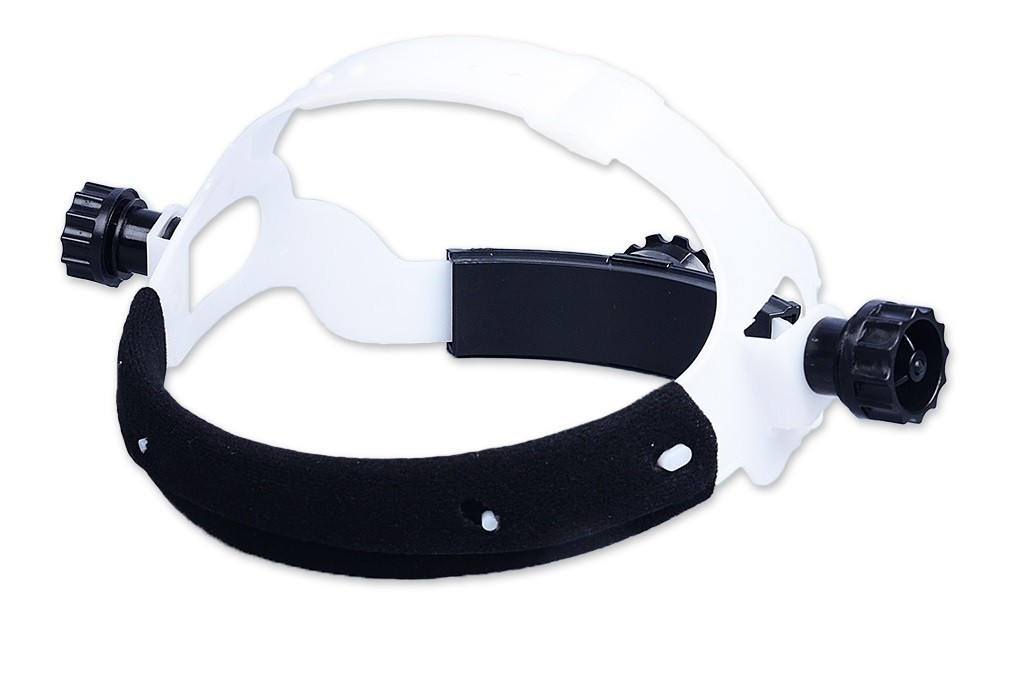
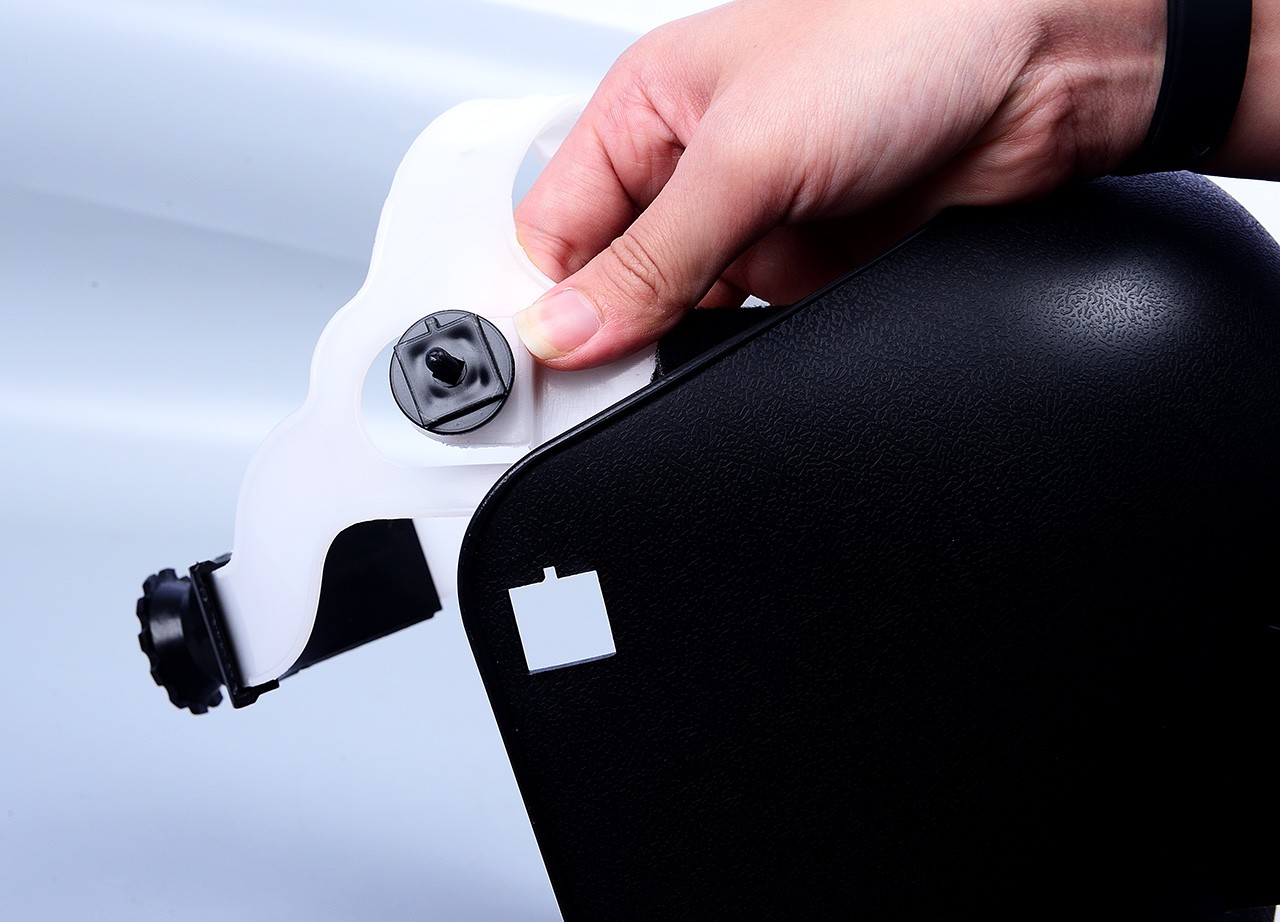
ไส้หน้ากากสวมหัว รุ่น YMD-1405N
กระจกใส่รุ่นบาง สามารถใส่กับหน้ากากกันแสงได้
** 25ชิ้น/กล่อง**
รายละเอียด
ไส้หน้ากากสวมหัว
Welding Helmet head hoop
การใช้งาน
ใช้ใส่กับหน้ากากเชื่อมแบบสวมหัว

คำแนะนำสำหรับการใช้งาน
- ปรับสายรัดแถบคาดศีรษะที่พาดหัวเพื่อให้หมวกอยู่บนศีรษะให้ต่ำที่สุด จับจุก 'G' ไว้ที่สายล่างลงในรู 'F' บนสายบน
- ปรับขนาดของแถบคาดศีรษะโดยใช้ปุ่มหมุนกระดุมที่ด้านหลัง ('E') กดปุ่มและหมุนลูกบิดจนกว่าแถบคาดศีรษะจะห้อยอยู่ที่ตำแหน่ง แต่ไม่แน่นเกินไป
- ใช้ลูกบิดสองปุ่ม 'A' ที่ด้านข้างของหมวกเพื่อปรับจำนวนของแรงเสียดทานที่เกิดขึ้นขณะที่คุณยกและลดหมวกนิรภัย
- เมื่อหมวกอยู่ในตำแหน่งที่ลดลงปรับความสัมพันธ์กับใบหน้าของคุณโดยใช้ตำแหน่งเกิดขึ้นเมื่อคุณเพิ่มและลดหมวกนิรภัย
- เมื่อหมวกอยู่ในตำแหน่งที่ลดลงให้ปรับความสัมพันธ์กับใบหน้าโดยใช้แผ่นตำแหน่ง 'D' หัวจุก 'H' ควรวางไว้ใน 3 หลุมด้านอื่นของหมวกนิรภัยจากลูกบิดควบคุมสี
- ระยะห่างจากแต่ละตาไปยังตลับสีอาจปรับได้โดยการคลายลูกบิด 'A' และเลื่อนสลักเกลียวพลาสติก 'B' เข้าไปในรูเปิดด้านใดด้านหนึ่งของหมวกนิรภัย
- ขณะนี้คุณพร้อมที่จะใช้หมวกนิรภัยแล้ว การแรเงาอาจปรับระหว่างการใช้งานโดยการตั้งค่าปุ่มควบคุมสีใหม่
Instruction for use
- adjust the headband strap that passes over the head so that the helmet is seated on the head as low as possible. snap the spigot 'G' on the lower strap into one of the holes 'F' on the upper strap.
- Adjust the size of the headband by using the ratchet knob at the rear (see 'E'). Depress and turn the knob until the headband sits f irmly in place, but not too tight.
- Use the two knobs 'A' on either side of the helmet to adjust the amount of friction that occurs as you raise and lower the helmet.
- when the helmet is in the lowered position adjust its relationship to your face using the locating occurs as you raise and lower the helmet.
- when the helmet is in the lowered position, adjust its relationship to your face using the locating plate 'D' The spigot 'H' should be placed in one of 3 holes on the other side of the helmet from the shade control knob.
- The Distance from each eye to the shade cartridge can also be adjusted by loosening the knob 'A' and sliding the plastic bolts 'B' within the slotted openings either side of the helmet
- You are now ready to use the helmet. The shading may ne adjusted during use by re-setting the shade control knob.
